How to Make Biltong at Home (and When to Buy Instead)
Making biltong at home is genuinely easy and genuinely easy to get wrong. The method is four steps and a wait. The failures are almost always the same three: the wrong cut, a humid room, and stopping too early. This guide covers the process, the equipment, the troubleshooting, and an honest answer about when it is not worth doing.
Want some on hand? Order biltong online: Glatt Kosher, air-dried in Florida, free US shipping over $50.
What you need
| Item | Why | Substitute |
|---|---|---|
| Silverside or topside beef | Lean, long straight grain, dries evenly | Eye of round works well |
| Brown or cider vinegar | Drops surface pH, adds the background tang | Red wine vinegar; not balsamic |
| Coarse salt | Draws water out; the primary preservative | Sea salt; avoid fine table salt |
| Coriander seed | The signature flavor — roast and crack it yourself | Pre-ground, at some cost to aroma |
| Black pepper | Heat and structure | — |
| A drying box or airflow | Moving air is the entire mechanism | A cardboard box with a small fan and a light bulb |
| Hooks or S-hooks | Pieces must hang without touching | Paperclips, straightened |
Note what is not on the list: a dehydrator. Standard dehydrator temperatures cook the meat, which produces jerky. If you want biltong, you want room-temperature air moving over the meat for days.
The method
1. Cut
Trim the sinew and most of the fat. Cut with the grain into strips about an inch to an inch and a half thick. With the grain, not against it — this is the opposite of jerky, and it is what gives biltong its shred.
Thickness decides drying time more than anything else. Thin strips can be ready in two or three days; a proper thick slab can take two weeks.
2. Vinegar
Dip or briefly soak the strips in vinegar. Some makers do a quick dip; others soak for an hour or two. Longer means more tang and a stronger acid barrier. Do not rinse it off afterward.
3. Salt and spice
Salt the meat and leave it for an hour or two — three to four hours for thicker pieces. Then brush off the excess salt. This step draws out a surprising amount of water and starts the process before the meat is even hung.
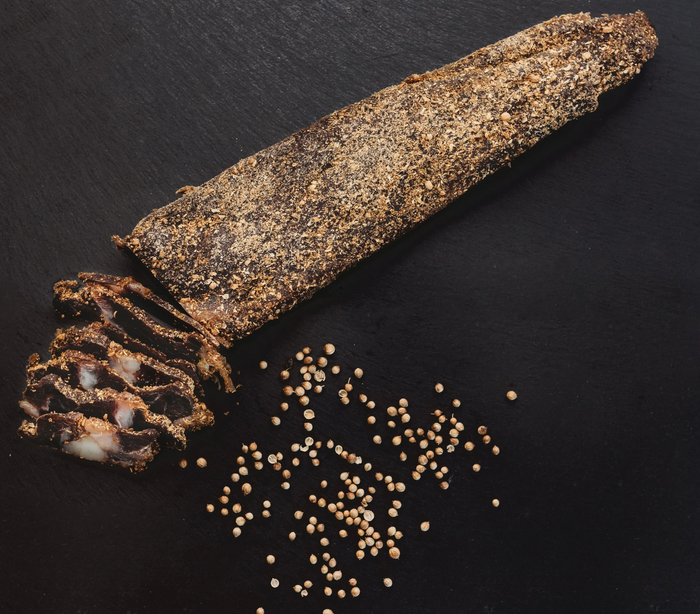
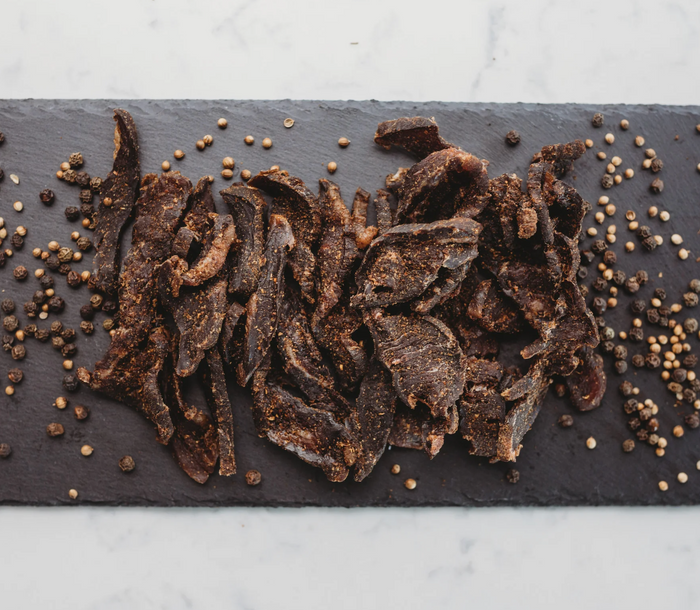
Then coat with the spice mix. A traditional blend, by rough proportion: two parts coriander seed to one part black pepper, plus salt to taste and garlic if you want it. Roast the coriander in a dry pan until it smells nutty, then crack it coarsely. That toasting step is the difference between good homemade biltong and flat homemade biltong.
4. Hang and wait
Hang the pieces so none touch each other, in a space with moving air, low humidity and a stable moderate temperature. A simple box with a small fan and a low-wattage bulb works well — the bulb is for gentle air movement and to keep humidity down, not to heat the meat.
Then leave it. Three to five days for thin strips; a week to two for thick. Resist the urge to test constantly, and resist the much stronger urge to stop early.
How to tell when it is done
This is the part that takes experience, and there is no substitute for it. But there are reliable signals.
- Weight loss. The most objective test. Weigh the pieces before hanging. Roughly 50% loss gives wet biltong; 55–60% is medium; 65%+ is dry. Write the starting weight down — everyone thinks they will remember, and nobody does.
- The squeeze. A finished piece has firm resistance with a little give. If it feels soft in the middle, it is not ready.
- The bend. It should bend and yield, not snap and not flop.
- The cut face. Slice one open. You want a firm dark edge and a deeper red center — but the center should not be wet or glistening.
- Time is the worst indicator. Humidity, airflow and thickness swamp any schedule. Use weight.
Troubleshooting
| Problem | Cause | Fix |
|---|---|---|
| Mold on the surface | Humidity too high, or pieces touching | Discard. More airflow, more space, more vinegar next time |
| Case hardening — dry outside, wet inside | Dried too fast; the outside sealed | Slow the airflow, lower the temperature, cut thinner |
| Too salty | Salt left on too long, or not brushed off | Shorter salt time; brush thoroughly |
| Bland | Coriander not toasted; too little spice | Toast and crack fresh; increase the coat |
| Too sour | Soaked in vinegar too long | Dip rather than soak |
| Tough and stringy | Cut against the grain, or over-dried | Cut with the grain; pull it earlier |
| Gray rather than red-brown | Poor airflow, or meat that was not fresh | Better circulation; start with better beef |
| Fat gone rancid | Too much fat left on | Trim harder next time — fat does not dry |
The three failures that account for most bad homemade biltong
The wrong cut. A marbled cut will not work. Fat does not lose water the way muscle does, so it stays soft while the meat around it dries, and it turns rancid before the piece is stable. Trim aggressively and start lean.
A humid room. Biltong is drying, and drying is a competition between the meat and the air. In a humid kitchen the air wins, water activity never drops far enough, and mold arrives. If your house is humid, you need a box with a fan and a dehumidifying element, not a corner of the pantry.
Stopping early. The outside looks and feels done long before the inside is. Pieces pulled too soon are the number one cause of homemade biltong going bad in storage — it looks fine on day one and grows mold on day four. Weigh it.
Storing what you made
Homemade biltong keeps less well than commercial, for one structural reason: you have no packaging barrier. No vacuum seal, no oxygen absorber. Everything rests on how far you dried it.
- Refrigerated in a sealed container: one to two weeks.
- Frozen, wrapped tightly: several months.
- Room temperature, open container: a few days, and check before eating.
- Never store it warm and sealed. Any residual moisture will redistribute and you will find mold.
If in doubt, dry it further. Over-dried biltong is disappointing; under-dried biltong is a health question.
Cost: is it actually cheaper?
Less than people expect, and this is worth knowing before you buy a drying box.
The yield is the reason. It takes roughly two to three pounds of raw beef to make one pound of biltong. At typical prices for a good lean cut, the raw beef alone for a finished pound lands close to the retail price of commercial biltong — before you count spice, electricity, equipment, and a week or two of waiting.
So make it because you want to control the style, because you enjoy the process, or because you want it wetter or drier or spicier than anything you can buy. Do not make it primarily to save money; the arithmetic does not really support that.
When to buy instead
- You live somewhere humid and do not want to build a controlled box.
- You want certified kosher or halal — home production cannot deliver certification.
- You want it consistent, batch after batch.
- You need it to keep for months, which requires oxygen-absorber packaging.
- You want to know what good biltong tastes like before you try to make it. This is the underrated one — it is very hard to hit a target you have never tasted.
Building the box
The most common first setup, and it works well enough that plenty of people never upgrade.
| Component | What it does | Getting it wrong |
|---|---|---|
| The enclosure | A plastic tub, a cardboard box, or a small wooden cabinet | Too small — pieces touch and mold at the contact point |
| Low vents | Let dry air in | None, and the box saturates |
| High vents | Let moist air out — warm wet air rises | Vents only at the bottom; the air has nowhere to go |
| A small fan | Moves air over every surface | Aimed at one spot, so the back row stays wet |
| A low-wattage bulb | Gentle convection; keeps relative humidity down | Too powerful — you are now cooking |
| Hooks | Hang pieces so nothing touches | Crowding, which is the commonest single mistake |
| A hygrometer | Tells you whether the problem is the meat or the room | Not having one, and guessing |
Two notes on the bulb. It is there for airflow, not warmth — an incandescent bulb of 20 to 40 watts creates just enough convection to keep air moving and humidity down. An LED produces no heat and will not do the job. And if the inside of the box feels warm to the touch, you have too much bulb and are drifting toward cooking, which changes the product entirely.
The hygrometer is the cheapest upgrade with the biggest effect. Most people who fail at home biltong are fighting humidity without knowing it, and a five-dollar gauge turns an invisible problem into a visible one.
Where to put it
The room matters more than the box.
| Location | Verdict | Why |
|---|---|---|
| Spare room or study | Best | Stable temperature, low humidity, no cooking |
| Garage | Good, seasonally | Cool and dry in most climates; check summer humidity |
| Cupboard or pantry | Good with a fan | Dark and stable, but needs deliberate air exchange |
| Basement | Usually poor | Cool but frequently damp — the worst combination |
| Kitchen | Worst | The most humid room in most houses, and the one people choose |
| Bathroom | Never | For obvious reasons |
| Outdoors | Only in a dry climate, and screened | Insects, dust, and weather you cannot control |
The kitchen row is the one that catches people, because the kitchen is where the counter space is and where food feels like it belongs. It is also where boiling, washing and steam happen all day. Drying meat is a competition between the meat and the air over who holds the water, and a kitchen hands the air a large head start.
The spice blend, with proportions
A workable starting point for roughly five pounds of meat, by volume:
| Ingredient | Amount | Notes |
|---|---|---|
| Coriander seed | 4 tbsp | Toast in a dry pan until fragrant, then crack coarsely. Do not skip either step |
| Coarse salt | 3 tbsp | Applied separately, before the spice, and brushed off after resting |
| Black pepper | 2 tbsp | Coarsely cracked, not ground |
| Brown vinegar | Enough to coat | Dip or short soak; do not rinse it off |
| Garlic powder | 1 tbsp | Optional |
| Brown sugar | 1 tsp | Strictly optional and traditionally contested |
| Chili flakes | To taste | For a peri-peri style |
Two steps do more for the result than the proportions do.
Toasting the coriander. Raw coriander seed tastes flat and faintly soapy. Thirty seconds in a dry pan, until it smells nutty, transforms it. This is the single biggest difference between good homemade biltong and disappointing homemade biltong.
Cracking rather than grinding. Cracked seed clings to a wet surface and stays aromatic through days of airflow. Ground spice coats unevenly, tastes dusty, and gives up most of its aroma in the first day. A pestle and mortar, or a rolling pin and a bag, is enough.
Buying the meat
The cut decides more than the recipe does, and a butcher will help if you know what to ask for.
| Ask for | Why | What to avoid |
|---|---|---|
| Silverside | The benchmark — lean, long straight fibers, dries evenly | Anything with visible marbling |
| Topside | Slightly softer, higher yield, good blended with silverside | — |
| Eye of round | Very lean and uniform; forgiving for a first attempt | — |
| Rump | Richer, if you accept a shorter shelf life | Not for a first batch |
| Brisket, chuck, shoulder | Workable if trimmed hard | Fat and connective tissue everywhere |
Ask the butcher to leave it in one piece rather than slicing it. You want to cut the strips yourself, along the grain, at a thickness you have chosen — and a butcher slicing "for biltong" will often cut across the grain out of habit, which is the one thing you cannot fix afterward.
Trim harder than feels reasonable. Fat does not dry the way muscle does. It stays soft while the meat around it hardens, dries unevenly, and can go rancid — a distinct paint-like smell — before the piece is stable. Silverskin and sinew should come off entirely; they never soften and they ruin the texture.
Judging doneness — the only method that works
Time is the worst indicator. Humidity, airflow and thickness swamp any schedule, and two identical batches a month apart can finish days apart.
Weigh the meat before you hang it. Weight loss is the only proxy for water activity available in a domestic kitchen, and without a starting number you are guessing. Write it down — everyone thinks they will remember and nobody does.
| Weight lost | Style | What it will be like |
|---|---|---|
| ~50% | Wet | Soft, deep red middle, shortest keeping |
| 55–60% | Medium | Firm edge, tender center — the usual target |
| 65%+ | Dry | Firm throughout, shreds, most forgiving |
The secondary checks, in order of usefulness: squeeze (firm with slight give), bend (yields, does not snap or flop), and cut one open (firm dark edge, deeper red center, not glistening). That last one destroys a piece and is worth it on a first batch.
Err toward drying further. Over-dried biltong is disappointing; under-dried biltong is a health question, and it is the failure that shows up four days later in a sealed bag rather than immediately.
Troubleshooting, expanded
| Problem | Cause | Fix |
|---|---|---|
| Mold on the surface | Humidity too high, or pieces touching | Discard. More airflow, more spacing, longer vinegar next time |
| Case hardening — dry outside, wet inside | Dried too fast; the outside sealed | Slow the airflow, raise humidity slightly, cut thinner |
| Too salty | Salt left on too long, or not brushed off | Shorter salt phase; brush thoroughly |
| Bland | Coriander not toasted, or too little spice | Toast and crack fresh; increase the coat |
| Too sour | Soaked in vinegar too long | Dip rather than soak |
| Tough and stringy | Cut against the grain, or over-dried | Cut with the grain; pull it earlier |
| Gray rather than red-brown | Poor airflow, or meat that was not fresh | Better circulation; start with better beef |
| Fat gone rancid | Too much fat left on | Trim harder |
| Some pieces done, others wet | Dead spots in the airflow, or crowding | Rotate positions daily; hang fewer pieces |
| Drying stalled entirely | Room humidity too high | Dehumidifier, or a different room |
Notice that six of those ten are airflow or humidity problems rather than recipe problems. People new to this reliably adjust the spice blend when the thing that needs attention is the room.
Your first batch, planned
- Start small. Two pounds of silverside, which will give you roughly three quarters of a pound finished. Enough to learn from, cheap enough not to hurt.
- Cut medium. Strips around an inch thick, with the grain. Thinner dries faster and is easier for a first attempt; thicker teaches you more.
- Weigh and record. Every piece, or the total. Write it on the box.
- Dip in vinegar rather than soaking, for a first batch — easier to correct upward next time.
- Salt for two hours, then brush off thoroughly.
- Toast and crack the coriander while the salt is working.
- Coat and hang, nothing touching, fan on, in the driest room you have.
- Check the weight on day three, then daily. Do not open the box more than once a day — every opening disrupts the airflow you set up.
- Pull at 55% loss for a medium result. Cut one open to see what 55% looks like inside.
- Refrigerate what you make, in a sealed container, and eat it within a couple of weeks.
Keep a note of the weather that week. After three or four batches you will have a personal sense of how your room behaves in different conditions, which is the actual skill — the recipe is the easy part.
What it actually costs
Worth doing the arithmetic before buying a drying box, because the answer surprises people.
The yield is the whole story: two to three pounds of raw beef become one pound of biltong. So a finished pound starts as roughly $18–$30 of lean silverside depending on where you shop, before spice, electricity, equipment and a week of waiting.
| Cost | Per finished pound |
|---|---|
| Beef (2.5 lb of silverside) | $18–$30 |
| Spice, salt, vinegar | ~$1 |
| Electricity, a week of fan and bulb | ~$1–2 |
| Equipment, amortized over a year | $1–3 |
| Total | ~$21–36 |
| Retail, properly made | ~$55–70 |
So there is a genuine saving — roughly half — but it is smaller than people expect, and it assumes no failed batches. One batch lost to mold wipes out the saving on three good ones.
Which means the honest reasons to make your own are: you want to control the style, you enjoy the process, or you want it wetter, drier or spicier than anything you can buy. Saving money is real but secondary, and it only materializes once you have stopped making mistakes.
Scaling up, and the mistakes that come with it
Once a few batches work, the temptation is to fill the box. Three things change when you do.
Airflow gets worse, non-linearly. Double the meat in the same box and you have not halved the air per piece — you have created dead zones where air barely moves at all. Those pieces mold while the ones near the fan finish early.
The room's humidity rises. All that water has to go somewhere. In a small enclosed room, a large batch can raise the ambient humidity enough to slow its own drying, which is a genuinely counterintuitive failure.
Batch variation appears. With ten pieces you can watch each one. With fifty you cannot, and the range between the driest and wettest widens. Rotate positions daily, and weigh a few pieces from different parts of the box rather than assuming they match.
The practical ceiling for a domestic box is usually far lower than its physical capacity. If you want more, the answer is a second box or better air exchange — not more hooks.
Safety, said plainly
Home drying is safe when it is done properly and the margin is thinner than commercial production, for one structural reason: you cannot measure water activity.
A commercial maker knows, with an instrument, when a batch has crossed below the threshold that supports bacterial growth. At home you have weight loss, which is a good proxy and not the same thing. That is why the advice is always to err toward drying further, refrigerate what you make, and eat it within a couple of weeks rather than treating it as shelf-stable for months.
The failure that matters is under-drying, and it is deceptive: the outside looks and feels finished long before the inside is. Sealed into a bag, that trapped moisture redistributes and mold appears three or four days later on meat that seemed perfect. Weighing is what prevents it.
And if a batch does mold, discard all of it rather than the affected pieces. What is visible on one indicates conditions the whole batch shared.
Storing what you made
| Stored as… | Realistic window | Why |
|---|---|---|
| Refrigerated, sealed container | 1–2 weeks | The sensible default for anything home-dried |
| Frozen, portioned and wrapped tight | Several months | Little free water left to form damaging ice |
| Room temperature, open container | A few days | Check by smell and surface before eating |
| Room temperature, sealed while not fully dry | Days, then mold | How most home batches fail |
| Vacuum sealed, fully dry | Weeks to months | Closest you can get to commercial, without the oxygen absorber |
The gap between homemade and commercial keeping is not the drying — it is the packaging. A commercial bag has a seal and an oxygen absorber, and those two barriers are most of why three to six months is possible. Without them you are relying entirely on how far you dried it.
If you make biltong regularly, a vacuum sealer is the single most useful piece of equipment after the box itself. Oxygen absorber sachets are also cheap and available, and dropping one into a sealed bag closes most of the remaining gap.
A first-batch checklist
- Lean cut, trimmed hard, cut with the grain
- Weight recorded before hanging
- Vinegar dip, not rinsed off
- Salted, rested, brushed off
- Coriander toasted and cracked, not ground
- Nothing touching anything in the box
- Vents low and high, fan on, no real heat
- The driest room in the house, not the kitchen
- Weighed daily from day three
- Pulled at 55% weight loss, then refrigerated
Ten lines, and they cover essentially every way a first batch goes wrong.
Quick answers
Can I make biltong in a dehydrator? You can dry meat in one, but at typical temperatures you are cooking it, and cooked dried meat is jerky. Some dehydrators with a fan-only setting can work.
How long does it take? Three to five days for thin strips, one to two weeks for thick. Humidity changes this more than anything else.
Do I need curing salt? No. Traditional biltong uses ordinary salt, vinegar and airflow. Nitrates are not part of the method.
What vinegar is best? Brown or apple cider vinegar. Red wine vinegar works. Avoid balsamic — too sweet.
Can I use a fan in the kitchen? Only if the kitchen is dry and cool. Kitchens are usually the most humid room in a house, which makes them the worst choice.
How do I know it is safe? Weight loss is your proxy for water activity. Aim for at least 50% loss, and refrigerate what you make.
Building a drying box
The most common first setup, and it works well enough that many people never upgrade.
- The box. A plastic storage tub, a cardboard box, or a small purpose-built wooden cabinet. Size it so pieces hang without touching each other or the walls.
- Airflow. A small computer fan or a desk fan positioned to move air through, not to blast one piece. Cut vents low for intake and high for exhaust — warm moist air rises, so let it out at the top.
- A low-wattage bulb. Not for heat but to create a gentle convection current and keep relative humidity down inside the box. An incandescent bulb of 20–40 W is plenty; an LED produces no heat and will not do the job.
- Hooks. S-hooks or straightened paperclips, spaced so nothing touches.
- A hygrometer. Cheap, and the single most useful upgrade. It tells you whether your problem is the meat or the room.
Aim for moving air, low humidity and a stable moderate temperature. If the inside of the box is getting warm to the touch, you have too much bulb and you are drifting toward cooking.
Getting the spice blend right
A workable starting ratio, by volume, for roughly five pounds of meat:
| Ingredient | Amount | Notes |
|---|---|---|
| Coriander seed | 4 tbsp | Toast in a dry pan until fragrant, then crack coarsely |
| Coarse salt | 3 tbsp | Applied separately, before the spice |
| Black pepper | 2 tbsp | Coarsely cracked, not ground |
| Brown vinegar | Enough to coat | Dip or short soak; do not rinse |
| Garlic powder | 1 tbsp | Optional |
| Brown sugar | 1 tsp | Strictly optional and traditionally contested |
Adjust from there. The two things that make the biggest difference are toasting the coriander and cracking it rather than grinding it — powder coats unevenly and tastes dusty, while cracked seed clings and stays aromatic through days of drying.
Taste the target first — knowing what you are aiming at is the most useful thing you can do before your first batch.